Showing posts with label watercolor. Show all posts
Friday, July 10, 2015
Big Bear Lake From North Shore -a plein air painting from Big Bear Lake -SOLD.
Tuesday, February 17, 2015
Tubes & Brushes -a painting of paint stuff in watercolor
Monday, December 1, 2014
Lily Pads -a watercolor painting
Tuesday, November 25, 2014
Bird On A Wire -a watercolor sketch
Friday, November 7, 2014
Three In The Nest - a bird's nest watercolor painting SOLD
Monday, July 7, 2014
Watercolor after Deschampe
Tuesday, July 1, 2014
Fruit Stand Reds & Greens
Wednesday, June 25, 2014
Flower Bowl With Fruit
Monday, June 23, 2014
Surrounding Red
Thursday, March 13, 2014
Desert Romance -sold
Tuesday, March 11, 2014
'Stream In The Desert
Saturday, February 22, 2014
Lucky Flowers
Monday, February 10, 2014
Windows, Idaho City -sold
Monday, December 16, 2013
Evening At Graber Olive House
Friday, August 3, 2012
Double Delight
watercolor 8x8 inches
Click to Purchase
I hadn't worked in watercolor in a while, so Wednesday night at my painting group I thought I'd tackle Carol Marine's DPW challenge: a rose. Yeah, try something really hard since I haven't done it in a while. My friend Martha told me it's a double delight after she served wine with bugs in it. She didn't mean to. What's a little extra protein? Double delight!
I've been framing to get ready for the LA County Fair. The Franken Frames Carol Marine mentioned are great. Looks like the cow wants out, though. Someday I'm going to build my own frames, but until then these work well. Also pictured, I'm using the "mirror trick" I learned from Roos' video. For an explanation, see the comments in yesterday's post.
Thursday, April 12, 2012
Tulips
watercolor 13x9 inches
Click to Purchase
One evening a week I get to meet with artsy friends and make art, talk art, laugh and eat dessert. I usually want to play around with watercolors in a "not very serious" way. This is what developed on one of those nights.
Thursday, March 22, 2012
Watercolor Demo
watercolor 11x15
This week has been a busy one with not much personal time for painting. Today I gave a private watercolor class for a student struggling with a painting she was doing on her own. She planned to start over, so I did a complete demo from her photo as she took notes. I tried to show her how to paint simply, capturing the essence of the scene without copying the photo.
Monday, February 20, 2012
Class Watercolor Finished
Here's my finished demonstration painting from my Monday night class. Also pictured is my student/friend, Margaret with her finished painting. You can see she's happy with how it turned out. She's wearing her sunglasses to temper her excitement. Not really. The 5500K studio lights are a bit much for her sometimes.
To finish it up we did some negative painting in the grasses, adding a few blades of grass on top, then painted the center of the flowers. To see the 4 posts showing the progression of this painting, go to labels below, click on watercolor and scroll down.
Wednesday, February 8, 2012
Class Watercolor Stage 3
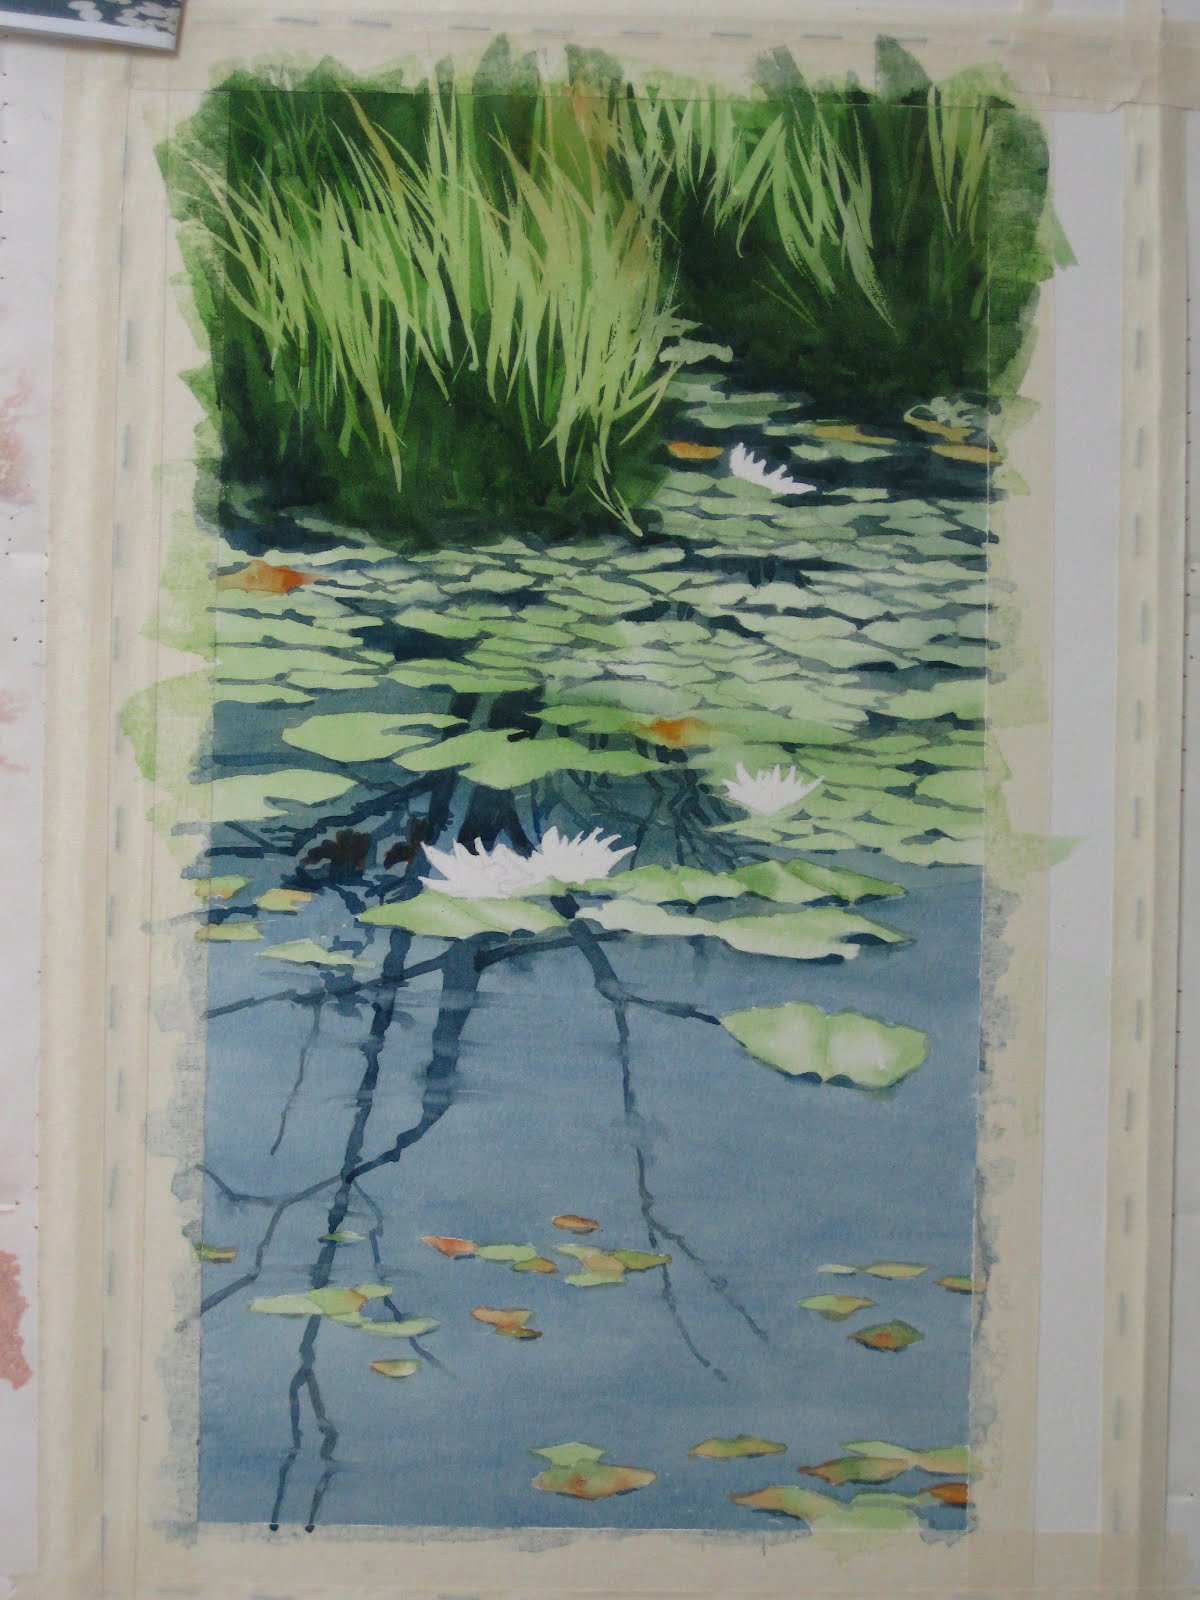
Update from January 28th post. We enhanced the shapes of the lily pads by painting the water spaces around them, careful not to outline. We wanted to maintain the large patches of lily pads otherwise all the repetitive shapes would be about the same size. We brought the water to the color and value desired with a second layer. The reflections of branches are added, lifting paint crosswise here and there to indicate water ripples. We removed the masking fluid on the lilies and bushes to reveal several values of green. Next class we'll finish the bushes with some negative painting, add centers to the flowers, make any needed adjustments and the painting will be finished. To see the previous posts in this series, go to "labels" below and click on "watercolor", then scroll down.
Saturday, January 28, 2012
Class Watercolor Stage 2
An update from my November 15th post. Much like choosing spices for a recipe, we developed a limited color palette by looking at the reference and making little mixed color swatches. A limited palette brings unity to the painting. The little color wheel indicates the pigments chosen. Both the color plan and value study will guide us along. Pictured here is the painting after our first class. The lilies were masked, then an underpainting was applied over the entire paper. The bushes at the top are done in alternating layers of paint and masking fluid, working from light to dark. In fact, all the paintings we do are painted from light to dark, building up in layers, working over the entire painting, a very traditional approach. I don't normally use mask when I paint, but for beginners and teeny things it's helpful. I hope this information is helpful to somebody out there. To see the previous stage "Thumbnails and Value Sketches" go to labels at the bottom of this post. Click on watercolor and scroll down to November 15th.
Subscribe to:
Posts (Atom)